-
Becoming A Software Consultant: My Backstory
I recently published a post about my first year of being an independent iPhone development consultant. The feedback from my readers was incredible, however there was one important thread on Hacker News that I wanted to address. The issues were:
One of my common hangups with these kind of posts is the lack of history as to what lead people to these consulting gigs. Where were you before, and how long were you there?
I found this to be a very valid point. Far too often you see guys posting their end of the year profits from their consulting gigs and they make it sound extremely easy. This can be dangerous as joe n00b might be so inspired that he quits his job and jumps right into the deep end without first preparing himself and assessing the risks involved.
That being said, I wanted to write a bit about my backstory and how it ultimately lead to my ability to strike it out on my own as a consultant. I have read stories similar to mine and there are a few key points that seem to be common, which I will highlight as I go.
**Circa Summer 2008 – Just Before Apple Releases The iPhone (not iOS) SDK **
In the summer of 2008, I was preparing to enter my senior year of college for Computer Science at UNM. A quick note about CS in New Mexico. There are TONS of government contractors (Sandia, Ultramain, Honeywell, Lockheed, etc.) in NM and college CS courses seem very much tailored to preparing students to head down this road towards one of these contractors. This is where most of my buddies from college ultimately ended up.
So, like any good UNM CS student, I got a job at Intel hacking C# tools for their engineers to use during testing. It was fine, but I knew I could not work in a cube forever.
Around that time, one of my buddies had the original iPhone and I was crazy jealous. I think I had some silly Windows CE brick or a Palm Treo or something. It was obvious that the iPhone was the “next big thing” and I took notice. So I started developing web apps for the iPhone, as that was the primary way to get custom apps for the devices. Apple even had a terrible (non mobile formatted) interface for exploring such web apps.
I built cool things like a Weight Watchers Point Calculator (my wife’s idea) and Minesweeper and to my surprise made a couple bucks a day on ads. This really fueled my excitement. Then, Apple announced the official SDK.
**An Aventure In iCodeBlog And Other NDA Violations **
When Apple first released the SDK, the App Store didn’t exist yet. All developers were forced under Apple’s NDA, stating that we weren’t able to discuss any aspect of the SDK on the web. As you can imagine, this left very little resources available for learning how to actually do development. There were no blogs, no books, and the only source of information was Apple’s documentation. I saw this as a HUGE opportunity.
I very quickly registered the domain icodeblog.com and setup WordPress. This led to my very first post in July of 2008. I had no idea what I was doing; it was my first blog ever, but I knew I would be able to learn more effectively if I was teaching others as I went along.
Being a Java developer, I was comfortable reading documentation so I dug right in to the iOS docs. I spent all of my free time (the time that wasn’t spent with my wife) learning and blogging. I was violating the NDA by discussing it on the web, but my page views were growing every day. Other blogs started to sprout up but I soon had the most popular iOS development blog on the web. I had over 10K RSS subscribers one month after my blog launch.
Things were really exciting, however, I had to start thinking about my future and how I was going to support my family. Still being a bit narrow-minded with my career choices, I applied for a job at Lockheed Martin and got a position. It was all set; I would graduate college in the spring and head to the “cube farm”. Destined for a life of “here’s your input, give me this output”, TPS Reports, and other corporate stereotype jokes…
That’s when I got my first iOS programming job offer…
Enter RightSprite
As you can imagine, the popularity of iCodeBlog did not go unnoticed. I received job inquiries quite often and one them happened to be from a guy who lived in Ireland named Jonathan. He was a wealthy American entrepreneur who had added a mobile offering to his already successful rails consultancy called RightSprite. However, he started his business by outsourcing to the Ukraine, which yielded fairly poor results.
So, in the winter of 2008 I received an email that they wanted to purchase iCodeBlog and give me a job replacing their outsourced team. He also happened to have an employee in NM named Josh. Josh and I met at a “hip” food place that I had never heard of and I was blown away that this was considered “business”. Needless to say, I was excited.
So here I am, about to graduate with a perfect job lined up, and I get an offer like this. I had no idea what to do. The idea of working remote was foreign to me and had never even crossed my mind. People can actually do that? I can work in my pajamas??
So I decided to take a risk, sell him my blog, and accept the job offer. I was terrified-especially when he told me that my first check was coming out of his personal bank account and that was why it was late. Little did I know, this would be one of the best career decisions I could ever make…
Build, Hire, Repeat
I graduated from college and my career was in full swing. I was the sole developer at a consultancy that had more mobile work than it knew what to do with. My family had no idea what I did. They though I was a drug dealer or something just as lucrative. At one point, my grandma asked me, “When are you going to get a real job like your cousin Michael (he works for the city)”. I could’t quite believe this was a legitimate job myself.
Things started to get very exciting. Jonathan asked me to help hire our next employee. Luckily, a guy by the name of Collin reached out to me and asked if he could guest blog on iCodeBlog. A few tutorials later and we offered him a job.
RightsSprite continued to scale up and I helped hire quite a few new developers. They eventually moved to a physical building in Portland, Oregon while I still worked remotely from NM. The team continued to grow.
A Book Deal
Even though I didn’t own iCodeBlog anymore, I still contributed to it from time to time. This lead to me being contacted by a few publishing companies with book offers. A book offer? It doesn’t sound that cool now, but in 2009, when there weren’t many iOS development books, it sounded incredible.
I decided to go with Manning Publishing and I updated their iPhone development book from web app-centric to SDK-centric. It amazed me that I struggled to write four paragraph essays in high school but I was now writing a four hundred page book with ease.
The book did fairly well and sold around 10,000 copies. Unfortunately, when you are an author of a tech book, that amounts to just about nothing in profit. As you can imagine, I had little motivation to do the update the next year when Apple updated the SDK.
A New Sheriff In Town
Shortly after moving the offices to Portland, the owner sold the company and we had a new president and CEO. He ran things a bit differently but ultimately things were cruising forward. Our team continued to expand and eventually I hired our first Android developers.
In December of 2011, I was promoted to the Director of Mobile Engineering. It was a fancy title and I was entirely proud to hand out business cards with that printed on them. I had helped build the team up to around sixteen mobile developers and it was now my job to manage them, as well as work closely with sales to land larger contracts.
2012 was a great year of working on cool projects including the Food Network and Google Fiber TV. I got to attend WWDC and spend a few weeks on Google’s campuses.
Things Get Shaken Up
Little did I know, there was some unrest in the company with the higher-up managers. One day, there was a company memo that the three people who were higher ranked than myself had all left. There were rumors as to why they left, but no one really had the true story. This caused a stir in the company and a few more developers began to follow suit.
This, of course, led to some company restructuring which put me right at the top with one other team member. I was now one of the highest paid people in the company and solely in charge of the entire mobile team.
I thought everything was perfect until one day in December of 2012, I received the following message when I logged into Gmail:
Your account has been suspended, please contact the administrator.
This made me considerably suspicious. I knew there was a lot of restructuring in the recent history and I immediately wondered if I was next on the chopping block. I was logged into Linked In at the time and noticed the company owner was the last person to view my profile. “He suspects me of looking for other jobs and is checking up on me”, I thought.
That’s when I received a message on Skype from him. It said:
Brandon, do you have time to talk?
My heart jumped into my throat. I knew what was coming next. He was soon up on video chat and proceeded to tell me that the company was undergoing some restructuring and my position has been eliminated. “Eliminated?” I thought. And then I asked him what that meant for me. He repeated the sentence again, said thanks, and hung up. That was it; I no longer had a job.
My “secure” job that I had been working at for four years disappeared in a matter of seconds with very little “real” explanation. I was speechless.
Taking The Plunge
After getting “let go”, I took the rest of the day off and went out with my family (wife and two kids). We were shocked, but I knew what I had to do. It was what I had been dreaming of doing for quite some time.
Armed with the knowledge of the entire software pipeline-from sales, to development, to maintenance-I hit the ground running the very next day in search of my first contract.
I wrote this blog post documenting that very first month.
Takeaway
It has been a little over a year since I’ve had a “secure” job. I put that word in quotes because I now believe the only way to have a secure career is to make one for yourself. You could be let go at any time, for any reason.
I was very fortunate to have a first job that allowed me to learn the needed skills to do what I’m passionate about; building consumer facing apps that get used by thousands of people. If you want to do the same, I would encourage you to find a job that lets you explore all of the aspects of consulting to find out if it’s right for you.
Sometimes I wonder why everyone is not a consultant. It feels so free to be able to hack outside on a nice day or go sailing with my buddies on a random Wednesday. But that’s just one side of the coin. Other days, I wonder why I am even doing it. I often wish I had a simple job with a well-defined task where once I got “off work”, I could go home and not think about it again until the next day but I don’t have that luxury. There are real risks and stresses involved with working for yourself so I urge you to weigh them out before taking the plunge.
I have received so many good questions through my last few posts about consulting. They have inspired me and I intend on taking this year to diligently blog about topics such as finding clients, health insurance, contracts, etc.
So please share and subscribe; I hope to help you on your journey to becoming free of your corporate chains.
This post is part of a series about becoming and independent software consultant. I am participating in this series with my good friend Josh. You can read his take on this post here.
-
What I Learned In My First Year Of iOS Consulting
Wow, I can’t believe it has already been a full year since I struck it out on my own. Last year, I published a post after my first month on doing contract iOS development. Needless to say, I have grown and learned quite a bit over the past year and I wanted to share some of those experiences.
Income
While I won’t share exact numbers, I left my 6 figure/year job to pursue the indie/consulting life. During the course of the year, I was able to amass 40% more income in 2013 than I had at my previous position.
In addition to that, I had the time to launch a couple iOS applications and thus upping my Apple income by about 20% this year.
Network Network Network
I would say spending time networking and meeting people is just as important as being able to write code if you want to be successful on your own. Through out the year, I dedicated at least five to ten hours a week just meeting with people, talking on the phone, and making new connections.
Often times, I would get contract opportunities that I knew for sure that I wasn’t going to take; either because I didn’t love the project, or (more often than not) because I didn’t have the bandwidth to take them on. However, rather than just writing the client back “I don’t have time“, I would take the call (or meeting in town), make the connection, and even listen to details about the contract.
My wife would tell me to stop wasting my time and that those hours would be better spent on project work that actually made money. However, these contacts are arguably more valuable than the hours “lost”. In many situations, I have reached out to those potential clients weeks or months later once I hired a new developer and was then able signed a contract. If I had declined the meeting to begin with, they probably wouldn’t have been as inclined to work with me so readily.
Subcontractors
Subcontracting has been a mixed bag for me. It seems to be the only (safe-ish) way to expand your business as a consultant, other than hiring full time developers. So, if you want to be able to work less yourself (which is almost never the case) or increase your companies revenue, you need to hire out.
Once I found the right people, subcontracting was a dream. I was able to reach more clients, still deliver the same value in the work, and achieve the client’s goals, all while expanding my business.
The main challenge I have had is deciding whether to hire subcontractors from here in the states or “offshore”. They both have their benefits and complications. Here are some I have found:
Benefits of hiring in the states:
- Communication – Most of the time their timezones are close enough that one of you is not inconvenienced to communicate in real time.
- Trust From Clients – Some clients still have some issues with “offshore”, especially because many of them have tried their hand at the ODesk lottery and have lost. So, saying you have US based team members sometimes makes them more comfortable. It’s unfortunate, but I have seen it to be true in some cases.
- Colleagues – Often times you already know or have worked with these guys since starting with acquaintances/friends is a good place to look for developers.
Complications hiring in the states
- Cost – US devs are expensive. Most of the time they have full time jobs and want to do consulting on the side. So it is important that they get paid more to do contract work than their day job pays.
- Colleagues – This is on the negative list as well because hiring people you know can get weird if things go awry.
**Benefit of Offshore developers **
- Cost – I put this here, however that doesn’t mean I hire “cheap” developers. Honestly, if you are not paying a contractor well, you are either under paying him and should give him a raise OR he shouldn’t be working for you as he’s probably too junior.
- Perspective – I have some incredible developers in other countries that have taught me quite a bit whether it’s about development, process, culture, or even my own code. It’s a great opportunity to learn.
**Problems with Offshore developers **
- Location – Timezone issues can be a problem if you let them. For example, I have a developer who lives in a completely different timezone than my own. However, he does a fantastic job of being available when he is needed. I have had other instances where it was very challenging to reach my developer in an event where I needed information on short notice.
- Vetting Process – Finding developers is a little more tricky. With devs in the states, you can just head to a local meet up or conference, but finding GOOD “offshore” devs is a little trickier. I have lucked out a few times, but for the most part it’s a bit more work. I would suggest spending a little of your own money to adequately search and vet each candidate.
- Language – While doing iOS development, you may need your client and your developer to communicate with one another. That being said, it’s vital to find a developer who you can understand and who can understand you in order to make communication possible.
Hiring An Assistant
Taking a page from Tim Ferris’ 4 Hour Work Week, I decided to hire an assistant. Ferris suggests “virtual”, however, I have hired one locally (she’ll be proofreading this post 😉 ). I think it’s one of the best decisions I have made as a business owner. Here is just a short list of things she handles for me:
- Contracts
- Invoicing
- Payments of contractors
- Research
- Phone calls
- Personal issues (like returns, purchasing equipment, etc.)
Even if she saves me two hours per week, she has paid for herself, and believe me, she saves me much more than that.
Never Decline A Contract
I mentioned this earlier in the post, but I want to reiterate it here. I seldom tell clients “no” and I really feel that it has worked out to my benefit. At the very least, I hear them out and add them as a contact to keep in mind for the future.
What I generally do when I can’t take on a client is I will give them an estimate of when myself or a member of my team will be available. That way, if they are okay with the timeline, I can keep the pipeline open. If not, there is no harm done. Also, if I hire another developer before the time I said I was available, sometimes the client will still have the need and I am able to fill it.
If I absolutely don’t have time or don’t want a particular contract, I will refer the client out to other dev shops. I don’t look at this as competition, but rather opportunity as I would hope they would do the same for me one day. As an added bonus, some of them have a referral fee so you can at least profit from pairing the client up.
Taxes
I have found out that taxes are less fun when you are self-employed than when you are employed by a business. Luckily my wife is MUCH better at money management than I am, so she set up a separate tax account where roughly 40% of our income would go.
One of the other good decisions I made besides hiring an assistant was hiring a CPA. She has saved me countless hours and fees and is worth her weight in gold.
Hire a CPA from day one; you will never regret it.
Family
I know this is a “business” related post, but I have to mention this. Having a wife and kids, I am very much a family man. Working for myself has been such a blessing since I have been able to spend considerably more time with my family than when I was employed by someone else.
For example, if it’s a nice summer day and the family decides to head to the zoo, I can just go without asking a boss for time off or taking PTO. I simply work in the evening or more hours the next day to recoup the time. Personal time management is key to be able to have this kind of freedom.
Summary
Overall, 2013 was an incredible year. While I did make mistakes (a ton), I gained so much knowledge and had a blast doing so. Going solo isn’t for everyone (some days I wonder why everyone** isn’t** doing it, and others I wonder why I am), but it’s been one of the most exciting experiences of my life.
I look forward to what 2014 brings and seeing how I can continue to grow my consultancy.
Happy New Year and Happy Hacking!
-
The Top 5 Places To Find Good Software Developers/Contractors
One thing I am often asked is “Where can I find good developers/contractors/subcontractors?” While I have found talent many different ways, I wanted to share my top 5 with you.
This post should be useful to you if you have a project and are looking to find a developer OR are a developer looking to subcontract some of your work. I am sharing these based solely on my experiences with them and hope you find value in this list.
1. Local Meetups
Local meet ups are the absolute best place in my opinion to find developers. Almost every city in the nation has some sort of group meeting on a regular bases for a given focus of development. You should have no problems finding a rails meetup group, iOS, Android, etc…
I would suggest finding out about such meetups in your area by Googling phrases such as “[your area] iOS meetup (sub iOS for rails, python, etc…). I regularly attend a “Cocoa Heads” group full of incredibly smart and capable mobile developers all willing to work on projects.
These types of groups are always excited to have clients come in and pitch their ideas. One piece of advice though, don’t go in to these groups and start with “I have a great idea and I will give you a percentage of the company in exchange for development”. They will stop listening immediately.
2. Popular Developers/Mailing Lists
This one is going to require a bit of work and research on your part, but I will get you started. Around the internet, there are a few of what I call “celebrity developers”. These are generally guys who have made a name for themselves and who are established as experts in their space.
While many of them are not taking on contract work themselves, they may or may not have a mailing list of interested contractors. One such person that does exactly this is Ray Wenderlich and I happen to receive emails on his contractor list.
Even if these developers don’t have lists, they generally have plenty of connections to point you in the right direction. Like I said, this method isn’t easy, but it can definitely have one of the biggest payoffs in terms of quality developers.
3. Specialize Project Sites
As of late, quite a few interesting sites have been popping up that have solved a fundamental issue when it comes to pairing developers with projects. The problems are 1. it’s hard to find good developers and 2. it’s hard to find clients with realistic cost expectations. That’s why ODesk exists 😉
The first of these sites that I have found is OOOMF. OOOMF is relatively new and you must be reviewed and accepted by their team in order to be a part of it. It’s basically a private network for pairing developers with projects and it supports all different project types (mobile, web, design, etc…).
Project owners can put their project up with a relative budget and developers can “apply”. The process then moves forward with communication between the client and the developers until a price and scope have been reached.
There is an additional overhead of 15% for using this service, but I think it’s well worth it.
Another one of these sites that is more mobile centric ishttp://apphappening.com. This site is very new and I have only just begun to use it. I should have a better review of them shortly.
4. Twitter and App.net
Twitter and app.net are definitely the preferred social network of serious developers. I would steer clear of Facebook and Linked in as this is generally where the recruiters hang out. Your message will most likely get dismissed as spam.
I’d suggest searching Twitter/App.net for the keywords of your project (iOS developer, rails, etc…) and find the folks with a ton of follows and a very small following to follower ratio. You will know them right away. Also, most of their blogs come up first in Google for many related keywords.
5. Developer Conferences
This one might cost you a bit of money, but is definitely well worth it. There are conferences for every focus of software development and they occur all throughout the year. These conferences generally have a HUGE percentage of professional developers who are just as eager to work on a project as you are to have them.
One of my favorite iOS conferences is 360iDev. It’s very indie-centric and offers an incredible community of iOS developers of all abilities. If you are looking to get a mobile project done, I strongly urge you to attend. While I can’t speak for conferences in other areas(web, etc…), I would really love some suggestions in the comments of this post if you are up for it!
6. Bonus – Right Here
Shameless plug time. If you are looking for professional mobile app (iOS or Android), I have a team of developers and am always looking to work on new and exciting projects. If you want to hear more about it head over to my Hire Us page or shoot me an email brandon @ pixegon [dot] com.
Conclusion
Whether you are a person/company looking to hire developers or a developer looking to hire contractors, I hope you have found this post useful. Your feedback in the comments is greatly appreciated. Best of luck with your search!
-
iPhone Programming Tutorial: Creating An Image Gallery Like Over – Part 1

Recently, I have had to build an app (download link) that required the user to choose a photo from their photo library. Rather than just throwing up a UIImagePickerController like many apps, I decided to add a little bit of style. Being inspired by Over’s ultra simplistic (and beautiful) photo selection interface, I decided to fancy things up a bit.
For this tutorial, I will start with a Fresh iOS6 View-Based application that uses Storyboards and ARC. Also note that I will be optimizing for the iPhone 5 resolution. You are free to make the tweaks necessary to deploy on the iPhone 4 and 4S.
Here is a breakdown of what we will cover in this part:
- Creating a UICollectionViewinside of Storyboard
- Using the ALAssetsLibrary to fetch photos from the user’s Camera Roll
- Displaying the ALAssets inside of the UICollectionView
1. Preparing The IBOutlets
Start by opening up **ViewController.m **and replacing the @interface declaration at the top with the following code:
@interface ViewController ()<UICollectionViewDataSource, UICollectionViewDelegate, UICollectionViewDelegateFlowLayout>
@property(nonatomic, weak) IBOutlet UICollectionView \*collectionView;
@end
|
This will declare the **IBOutlet **needed to hook up the main UICollectionView that we will be using to display the user’s photos. I have also set up our class to be a UICollectionViewDataSource, UICollectionViewDelegate, and UICollectionViewDelegateFlowLayout. This is necessary when interfacing with the UICollectionView.
2. Setting Up The UICollectionView In Storyboard
Open up **MainStoryboard.storyboard **and drag a UICollectionView on to your view ensuring that it stretches the entire screen.

Then, Control-Click and drag from the **UICollectionView **to your **ViewController **Object and set it as the **delegate **and datasource.

Finally, **Control-Click **and drag from **View Controller **to Collection View and selected **collectionView **to make the **IBOutlet **connection.

Now, we need to give a Cell Identifier to the UICollectionViewCell so that we can reference it in code. Click on the default cell inside of the UICollectionView and open the **Attributes Inspector. **For the Identifier type in PhotoCell. The cell might be a little tricky to see as its background color is clear, but it’s there. Simply click in the top left corner of the UICollectionView.

Now that the UICollectionView has been set up, it’s time to fetch the photos from the user’s photo library.
If you are using the simulator, make sure to populate the Photo Gallery with images from the web. Simply open up a browser, do a Google Image Search, and click and hold on various images. You should have an option from the menu that pops up to save the images to your camera roll.
Finally, open up the **Photos** app on the simulator to initialize the Assets Library.
3. Fetching ALAssets (user photos) From The ALAssets Library
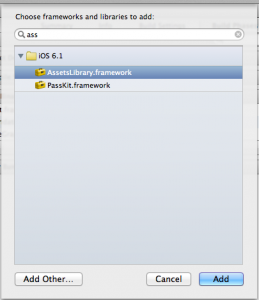
In order to interface with the user’s photo library, we must first import the **AssetsLibrary.framework **framework. To do this, click on your project in the sidebar, select the Target, then click **Build Phases, **expand the Link Binary With Libraries section and click the **+ **button. Do a search for **Assset **and then double click on AssetsLibrary.framework.
It should now be added to your project and ready to use. Now that it has been linked, we must import it into the **ViewController.m **file. Open up **ViewController.m **and add the following import to the top of the file:
#import <AssetsLibrary/AssetsLibrary.h>|
Before we can fetch the user’s photos, we need to set up an NSArray to put them in. Add the following line within the **@interface **declaration at the top.
@property(nonatomic, strong) NSArray \*assets;|
Now, add the following method to your class:
+ (ALAssetsLibrary \*)defaultAssetsLibrary
{
    static dispatch_once_t pred = ;
    static ALAssetsLibrary \*library = nil;
    dispatch_once(&pred, ^{
        library = [[ALAssetsLibrary alloc] init];
    });
    return library;
}
|
This is a static method that creates a static instance to the ALAssetsLibrary. The reason this is needed is, when we enumerate the ALAssets in the next method, it seems that the assets get released immediately and otherwise wouldn’t be able to be used in the rest of the application. I will explain this a little more in a moment.
Head over to viewDidLoad and add the following code:
- (void)viewDidLoad
{
    [super viewDidLoad];

    _assets = [@[] mutableCopy];
    __block NSMutableArray \*tmpAssets = [@[] mutableCopy];
    // 1
    ALAssetsLibrary \*assetsLibrary = [ViewController defaultAssetsLibrary];
    // 2
    [assetsLibrary enumerateGroupsWithTypes:ALAssetsGroupAll usingBlock:^(ALAssetsGroup \*group, BOOL \*stop) {
        [group enumerateAssetsUsingBlock:^(ALAsset \*result, NSUInteger index, BOOL \*stop) {
            if(result)
            {
                // 3
                [tmpAssets addObject:result];
            }
        }];

        // 4
        //NSSortDescriptor \*sort = [NSSortDescriptor sortDescriptorWithKey:@"date" ascending:NO];
        //self.assets = [tmpAssets sortedArrayUsingDescriptors:@[sort]];
        self.assets = tmpAssets;

        // 5
        [self.collectionView reloadData];
    } failureBlock:^(NSError \*error) {
        NSLog(@"Error loading images %@", error);
    }];
}
|
- Grab our static instance of the ALAssetsLibrary
- Enumerate through all of the **ALAssets **(photos) in the user’s Asset Groups (Folders)
- Enumerate each folder and add it’s **ALAssets **to the temporary array
- Sort the assets list by date (this won’t work yet, but I will show you how to fix later). For now this code is commented out and the Assets will be sorted however they come out.
- Reload the UICollectionView (this won’t work yet as we haven’t set up the delegate methods)
Now that we have an NSArray populated with ALAssets, let’s set up the **delegate **methods for the UICollectionView in order to populate it with data.
4. Populating the UICollectionView With Data
A UICollectionView functions much like a **UITableView **having delegate and datasource methods. Add the following methods to your ViewController class to populate the view.
#pragma mark - collection view data source

- (NSInteger) collectionView:(UICollectionView \*)collectionView numberOfItemsInSection:(NSInteger)section
{
    return self.assets.count;
}

- (UICollectionViewCell \*) collectionView:(UICollectionView \*)collectionView cellForItemAtIndexPath:(NSIndexPath \*)indexPath
{
    UICollectionViewCell \*cell = (UICollectionViewCell \*)[collectionView dequeueReusableCellWithReuseIdentifier:@"PhotoCell" forIndexPath:indexPath];

    ALAsset \*asset = self.assets[indexPath.row];
    //cell.asset = asset;
    cell.backgroundColor = [UIColor redColor];

    return cell;
}

- (CGFloat) collectionView:(UICollectionView \*)collectionView layout:(UICollectionViewLayout \*)collectionViewLayout minimumLineSpacingForSectionAtIndex:(NSInteger)section
{
    return 4;
}

- (CGFloat) collectionView:(UICollectionView \*)collectionView layout:(UICollectionViewLayout \*)collectionViewLayout minimumInteritemSpacingForSectionAtIndex:(NSInteger)section
{
    return 1;
}
|
This code should be fairly straight forward if you have ever worked with a UITableView. The only lines to note are where ‘cell.asset = asset’ is commented out and we set the cell’s background color to red. We will uncomment that line when we create a custom cell to display the image (for now it won’t). I have also set the background color to red so that you can see that the number of cells is actually corresponding to the number of photos in the camera roll.
Build and Run!
Let’s take a break to do a build and run to see what happens. If you have hooked everything up correctly, you should see a black screen with red squares on it with a count equalling the number of photos in the user’s library.
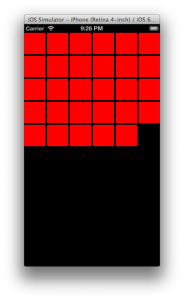
Not too exciting, however it shows that we are displaying a number of cells corresponding to the number of photos in the user’s asset library. At least it’s showing that you have done something. The next step is to create a custom UICollectionViewCell that actually displays the photos, which we will do next time.
5. Next Time
That’s all for today. In a ploy to get you to come back to my site (and subscribe to my RSS feed), I have chosen to break this post up into two parts.
Luckily for you, I wrote the above message a while ago. Click the link below to go to part 2!
iPhone Programming Tutorial: Creating An Image Gallery Like Over – Part 2
Stay tuned!
-
5 Third Party iOS Libraries I Have Found Useful Lately
As I mature as a developer, I try to rely on other people’s code more an more. Why build something from scratch when a solution already exists that you can fit in your project. In Pocket MUD Pro, I used 13 3rd party libraries and am using quite a bit more in the project that I’m currently working on. I figured that I would share some of the libraries that I have been using so that it might save you some time in the future.
1. CocoaAsyncSocket
Link: https://github.com/robbiehanson/CocoaAsyncSocket
Many of my applications involve TCP or UDP networking. There is a lot of boiler plate code involved in every networked application, and CocoaAsyncSocket solves much of that for you.
2. Appirater
Link: http://github.com/arashpayan/appirater/

Hopefully, you have heard of this one or a similar library by now. It’s very challenging to get users to want to review your applications, let alone give you a positive review. AppiRater allows you to prompt a user to rate your application based on either number of launches or “significant events” which you specify.
3. Zip Archive
Link: http://code.google.com/p/ziparchive/
I try to ship small applications that download assets upon launch. A good way to send these assets over the wire is to zip them up and stick them on your server. I have written an article about this on iCodeBlog.
4. Quick Dialog
**Link: ** https://github.com/escoz/QuickDialog
Creating forms in iOS is pretty painful. It usually involves custom table cells and a lot of delegate nonsense. QuickDialog takes away some of this pain and allows you to easily create iOS forms. You can even design them using JSON.

5. TSMiniWebBrowser
Link: https://github.com/tonisalae/TSMiniWebBrowser
Often times, you want a quick and dirty browser in your application. I generally use it to point to in-app documentation or take the user to a page after tapping on a link. It’s quick and easy.
I hope you find some value in this list. I’d love to hear about the libraries you use frequently.
Happy Coding!
-
Beginning Jailbroken iOS Development – Building And Deployment
Welcome to the next installment of my jailbroken iOS development series. If you haven’t already done so, read my previous post to get up to speed.
Beginning Jailbroken iOS Development – Getting The Tools
Now that your environment has been set up, it’s time to start hacking your project, building, and deploying it. This tutorial will be fairly quick and will just demonstrate how to build a .deb file and install it on your device. This will not cover creating a Cydia repository for public access (this is for a later tutorial).
Introduction
Start by creating a simple project. Refer to the previous tutorial to determine how to do this. I will use the example of the #1 iphone/application and will be calling it fooProject.
<code class=’bash’>$/opt/theos/bin/nic.pl
NIC 1.0 - New Instance Creator
——————————
  [1.] iphone/application
  [2.] iphone/library
  [3.] iphone/preference_bundle
  [4.] iphone/tool
  [5.] iphone/tweak
Choose a Template (required): 1
Project Name (required): fooProject
Package Name [com.yourcompany.fooproject]:
Author/Maintainer Name [Brandon Trebitowski]:
Instantiating iphone/application in fooproject/…
Done.</code>
This will create a new directory for our project with the following files.
- control: Contains information about your application/tweak. This is the info you see when you install something from Cydia (name, author, version, etc…)
- [applicationName]Application.mm: This is essentially your appDelegate file. It creates a window, adds your RootViewController and displays it.
- main.m : Same main file that you would use in an iPhone project. Just initializes your [applicationName]Application.mm file on launch.
- Makefile: contains the necessary build commands to compile your project. I’ll go over this in detail in a bit
- Resources: This folder contains your info.plist and is also where you can place all of your images
- RootViewController.h/mm: A simple view controller
The Makefile
theos provides some great tools that simplify the build process as much as possible. I know some of you might shudder at the sound of a Makefile, but trust me, it’s very painless.
Let’s first take a look at the anatomy of the Makefile that was generated.
<code class=’bash’>include theos/makefiles/common.mk</code>This line simply tells theos to include the common make commands in your build script to save you some work.
<code class=’bash’>APPLICATION_NAME = fooProject</code>The name of the application we are building. The Makefile will use this constant to do a number of things under the hood. Don’t modify this unless your application changes names.
<code class=’bash’>[applicationName]_FILES = main.m fooProjectApplication.mm RootViewController.mm</code>This is the meat of the Makefile. It’s the list of m (or mm in this case) files that need to be compiled. *Note: you do not add your .h files here. So, whenever you add a new .m file to the project, make sure to append it to this list or it won’t get built.
<code class=’bash’>[applicationName]_FRAMEWORKS = UIKit Foundation QuartzCore AudioToolbox CoreGraphics</code>This line is not included by default, but is needed if you want to use ANY frameworks; be them Apple’s or h4x0red ones.
<code class=’bash’>include $(THEOS_MAKE_PATH)/application.mk</code>More defaults to help theos build your project.
Setting up Your Environment
Do you remember in the last tutorial that we had to set an environment variable in order to use theos? Well, we need to set a couple more to build and deploy.
Here are the 3 that you MUST have.
<code class=’bash’>export THEOS=/opt/theos/
export SDKVERSION=4.3
export THEOS_DEVICE_IP=192.168.1.122</code>
The first line, you should have already done. Otherwise you would not have been able to run the nic tool above. The second defines your current SDK version. This will tell theos where to look for your frameworks and whatnot. (ex If you only have 4.2 installed, set this to 4.2). Finally, the last line, tells theos the ip address of your device.
Once theos does the package install, it will sftp the package to your device for installation. One thing to note here is your iPhone MUST be on the same network as the computer you are developing on.
If you don’t know your device’s ip address, it’s in the SBSettings menu. If you don’t have SBSettings, go download it from Cydia and think about why you would have a jailbroken device without this app installed…
Building The Project
Building is just as easy as running the make command inside of your project’s root directory.
Here is an example of building my fooProject app using the command:
make.
<code class=’bash’>$ make
Making all for application fooProject…
 Compiling main.m…
 Compiling fooProjectApplication.mm…
 Compiling RootViewController.mm…
 Linking application fooProject…
 Stripping fooProject…
 Signing fooProject…</code>
If your project contains errors, they will be flushed out here. Also, theos treats warnings as errors (as should you) 😉 . So, if you have any warnings you won’t be able to build.
When you are ready to distribute your application, you must build a .deb package. Luckily, theos does this for us with a simple command:
make package.
<code class=’bash’>make package
Making all for application fooProject…
make[2]: Nothing to be done for ‘internal-application-compile’.
Making stage for application fooProject…
 Copying resource directories into the application wrapper…
dpkg-deb: building package ‘com.yourcompany.fooproject’ in ‘/Users/brandontreb/Desktop/fooproject/com.yourcompany.fooproject_0.0.1-1_iphoneos-arm.deb’.</code>
You should now see a file like com.yourcompany.fooproject_0.0.1-1_iphoneos-arm.deb in your project’s root directory. One great feature of theos is it handles versioning automatically. So subsequent builds will increment the build number. If you change your version in the info.plist file, it will start the build counter over (2-1, 2-2, etc…).
At this point, you could sftp this file to your device and run:
<code class=’bash’>dpkg -i com.yourcompany.fooproject_0.0.1-1_iphoneos-arm.deb</code>as root to test the installation. However, that is quite a bit of a pain. Luckily, theos will do all of this for you by simply using the command:
make package install
<code class=’bash’>$ make package install
Making all for application fooProject…
make[2]: Nothing to be done for `internal-application-compile’.
Making stage for application fooProject…
 Copying resource directories into the application wrapper…
dpkg-deb: building package ‘com.yourcompany.fooproject’ in ‘/Users/brandontreb/Desktop/fooproject/com.yourcompany.fooproject_0.0.1-3_iphoneos-arm.deb’.
install.copyFile "/Users/brandontreb/Desktop/fooproject/com.yourcompany.fooproject_0.0.1-3_iphoneos-arm.deb" "com.yourcompany.fooproject_0.0.1-3_iphoneos-arm.deb"
root@192.168.1.122’s password:
com.yourcompany.fooproject_0.0.1-3_iphoneos-arm.deb                                                                                                                                                                                                                              100% 4434     4.3KB/s   00:00
install.exec "dpkg -i com.yourcompany.fooproject_0.0.1-3_iphoneos-arm.deb"
root@192.168.1.122’s password:
Selecting previously deselected package com.yourcompany.fooproject.
(Reading database … 2006 files and directories currently installed.)
Unpacking com.yourcompany.fooproject (from com.yourcompany.fooproject_0.0.1-3_iphoneos-arm.deb) …
Setting up com.yourcompany.fooproject (0.0.1-3) …</code>
You will have to enter your password several times during the process. The default is alpine.
After this has been run, you will need to restart (or respring) your iPhone. Respringing takes a simple button tap if you have SBSettings installed (have you installed it yet?).
Conclusion
You now have all of the tools needed to start hacking your very first jailbroken iOS application. In the next tutorial, we are going to learn about MobileSubstrate hacks and how to overwrite Apple functionality. I will give a basic example of how to display an alert message every time your device boots up.
Until next time, happy hacking!
-
My Journey To Create The inPulseNotifier For Jailbroken iPhones – Part 2
This post is a continuation from my previous post found here.
A MobileSubstrate Tweak?
After I completed a basic app that allowed me to send various notification types from my iPhone to my inPulse watch, I quickly realized that this would not work if I wanted to hook into the iPhone’s notification system. A Google search revealed to me that I had to make MobileSubstrate hack to overwrite the default notification functionally.
** What the heck is Mobile Substrate? **
Here is the description according to iPhoneDevWiki.net.
MobileSubstrate is the de facto framework that allows 3rd-party developers to provide run-time
patches (“MobileSubstrate extensions”) to system functions, similar to Application Enhancer on
the OS X. MobileSubstrate consists of 3 major components: MobileHooker, MobileLoader and safe mode.
Basically, it allows you to “hook” into any method of any class on the iPhone. I will talk in a later tutorial about how to see what methods are available. Here is a sample for hooking into the CFShow() method:
<code class=’objc’>static void (*original_CFShow)(CFTypeRef obj);  // a function pointer to store the original CFShow().
void replaced_CFShow(CFTypeRef obj) {           // our replacement of CFShow().
  printf("Calling original CFShow(%p)…", obj);
  original_CFShow(obj);                         // calls the original CFShow.
  printf(" done.\n");
}
…
// hook CFShow to our own implementation.
MSHookFunction(CFShow, replaced_CFShow, &original_CFShow);
// From now on any call to CFShow will pass through replaced_CFShow first.
…
CFShow(CFSTR("test"));</code>
Yeah… this looks pretty intense. Luckily, I found a super helpful tool that greatly simplifies this process called theos. Check out my tutorial on getting started with theos.
What lead me to theos was the incredible work of Peter Hajas. He wrote and open sourced his fantastic notifications app called Mobile Notifier. Without it, I would have been dead in the water. After chatting downloading his code and nagging him on Twitter, he pointed me to theos.
Working With theos
As I mentioned in my tutorial, theos is a great tool to aid in the development of a Mobile Substrate Tweak. Instead of the complexities above to hook into the functionality of classes, you simply do something like this:
<code class=’objc’>%hook SpringBoard
-(void)applicationDidFinishLaunching:(id)application
{

%orig;
INPreferenceManager *preferenceManager = [[[INPreferenceManager alloc] init] autorelease]; BOOL enabled = [[preferenceManager.preferences valueForKey:@“inpulseEnabled”] boolValue]; if(enabled) { manager = [[INAlertManager alloc] init]; [manager connectToWatch]; }
}


* (void) dealloc {
[manager release];
manager = nil;
%orig;
}


%end;</code>
This is a simple hook that allows me to overwrite the functionality of Springboard’s applicationDidFinishLaunching method. DHowett (creator of theos), has done a brilliant job giving devs quite a few commands like %orig (which calls the original method) and %hook (starts a hook).
The reason this works is, the file you code in (called Tweaks.xm) gets run through a preprocessor called Logos (which he also wrote). It replaces these simple commands with the complex stuff you see above before compiling your project. Using this technique, you can hook into anything. I will have a tutorial on this in the very near future, so make sure you subscribe to my RSS feed if you haven’t already.
Copy And Paste
OK, so I copied some of Peter’s code (he’s well cited in the source and I kept his license in the headers too). He had already solved the problem of capturing most of the iPhone’s notifications and this is precisely what I needed. So I Frankensteined my code and his to create the first version of inPulseNotifier.
This current version supports SMS, Push Notifications, Local Notifications, and Calendar Notifications.
Deployment
Even though I open sourced the code for the app, I couldn’t possibly expect users to build the code themselves and install it on their devices. So I had to learn about setting up my own Cydia repository.
A Cydia repository allows users to browse your applications/tweaks through the Cydia application created by Saurik. This is the method of choice for deploying jailbroken iPhone applications.
Saurik has a very detailed tutorial on creating a Cydia repository here.
(In case you are wondering, my Cydia repo is hosted at http://brandontreb.com/cydia )
OK, How Do I Install It?
Great question I assume you might ask. I have written a tutorial about installing it on your iPhone here.
Plans For The Future
Well, at the moment development has slowed as I prepare for a few changes in my life. However, in the coming months, I intend on doing the following updates.
- Remove the dependency on Insomnia for preventing the phone from sleeping. I have found a version of their source that I can integrate into my own code.
- Add support for phone calls
- Add support for emails
- Create an SBSettings toggle to allow rapid enabling/disabling
- Auto-reconnect after disconnecting from the watch
Conclusion
Hacking for the inPulse watch has been a new and exciting experience. The team over there has really created something special and I can’t wait to see what the future holds for them (hopefully a touchscreen).
I’d love to hear your thoughts in the comments. And stay tuned for some jailbroken dev tutorials based on my experiences.
Happy Coding!
-
My Journey To Create The inPulseNotifier For Jailbroken iPhones – Part 1
Many of you may have seen my tweets or blog posts regarding my development of a native iOS interface for the inPulse Watch. I just wanted to share a bit with you about the development process and talk about my updates moving forward.
What is the inPulse Watch?
For those of you who don’t know, the inPulse watch is a programmable wristwatch with a bluetooth controller. It can run a single app at a time on top of it’s firmware that is installed on the watch via a bluetooth interface with your computer. People have written all sorts of apps from analog clocks to roguelikes and Connway’s Game of Life. Check out http://inpulsewatch.com/watchapps.asp to see the latest apps.


It Begins
After waiting about 10 days for my watch (yeah it’s a long waiting period since they have seen quite a bit of recent success), it finally came in the mail. Enthusiastically, I opened it up and followed their getting started guide. Within a few minutes I was running some of the sample applications in the forums.
No iOS Support?
One of the coolest features of the watch is the ability to have your smartphone notifications show up on it. You are able to read SMS, Email, Calendar, etc… for a wide variety of Blackberry and Android phones.
After digging around a bit, I was disappointed to see that there was limited (no) iPhone support. They had some old file that used BTStack at some point to communicate a simple canned message to the iPhone. No documentation, no support, nada.
Building The App
As I had no experience developing for a jailbroken iPhone, I had no idea how to even compile this sample app. So, I used the Google machine and found the Google repository for BTStack (the bluetooth library of choice for jailbroken iOS apps). I was able to download the source and build a sample application that basically connected my iPhone to a bluetooth device.
Well, this got me started. So I did what any curious developer would do and started plugging crap in. I replaced the sample file that was packaged with BTStack with a slightly modified version of inPulse’s sample iPhone file. Sure enough, I was able to build and install it.
We Have Connection
After figuring out how to hardcode my watch’s address into the source, I was able to determine that the iPhone had actually connected to the watch. I monitored the packets and threw up an alert view (No NSLogging available at this point) when a connection was made.
So, now that we are connected, let’s trying sending the sample message…fail! I couldn’t even send the time.
At this point, I decided to move the code I had written into a sample iPhone project so that I could do attached debugging. This showed me that the packets were arriving on the watch since I received an ack packet back. So, the watch sees the messages, but doesn’t consider them notifications.
Time to hit the docs
 Knowing that the packets were received gave me quite a bit of hope. I figured that I must have had the protocol incorrect. So, I dug into the inPulse protocol document which outlined what the packet structures should look like. My C skills aren’t the strongest so I had to look up quite a few things.
Sure enough, they had upped the version number of their protocol by 1 and mine was outdated. So, I updated what I could and gave it another shot…fail.
Knowing that the packets were received gave me quite a bit of hope. I figured that I must have had the protocol incorrect. So, I dug into the inPulse protocol document which outlined what the packet structures should look like. My C skills aren’t the strongest so I had to look up quite a few things.
Sure enough, they had upped the version number of their protocol by 1 and mine was outdated. So, I updated what I could and gave it another shot…fail.No messages were displaying. At this point I was ready to give up. I read online somewhere that the BT implementation on the watch was not supported by inPulse and felt dead in the water. So I took a break for a couple days.
When I came back to it, I was tapping through my watch and noticed that the calendar appointments had some data in them on the watch. Could it be? Did my notifications arrive? (I was trying to send SMS notifications). So I dug into the docs again…
We have a message!!!
 Sure enough, I had some fields declared as * uint16_t * when they should have been * uint8_t * . My headers were the wrong size!!! All of a sudden I was able to send every type of notification to the watch and have it displayed.
It was now time to build out an actual application for release to inPulse. The next hurdle would be hooking into the iPhone’s messaging system and forwarding along the messages. Now the real iPhone hacking begins.
-
Beginning Jailbroken iOS Development – Getting The Tools
Developing for jailbroken is actually quite similar to regular iOS development with one addition. More Power! oh oh oh (said in a Tim Taylor voice (sorry for non-Americans that don’t get the reference)). With your device jailbroken, you have the ability to hook in to pretty much every class that Apple writes allowing you quite a bit of control over the iPhone’s functionality.
In today’s tutorial, I will simply be discussing the best way to get up and running with the tools necessary to write a jailbroken iPhone app. We will not be doing any coding, however this tutorial will be necessary for all posts going forward.
Theos
There are many ways to go about writing a jailbroken iOS app. Most of them are quite complex. @DHowett has come up with a brilliant tool called theos which drastically simplifies the process. My tutorial will pretty much be a regurgitation of his tutorial found here with some added cheesy jokes.
Theos is a command line utility that essentially generates a template for creating applications, libraries, preference bundles, tools, and mobile substrate hacks. These cover 99% of the jailbroken apps that you are likely to create.
One thing to note is DHowett talks about doing jailbroken iOS development on both Mac and Linux; my tutorials will be Mac-only.
Step 1: Install the iOS SDK
You will first need to install the official iOS SDK.
http://developer.apple.com/devcenter/ios/index.action
You can register for a free account and download the latest SDK. Once installed reboot your Mac and come back here. I’ll wait…
Step 2: Setting Up The Environment Variables
Start by deciding on a good location to install theos. The suggested location is /opt/theos. The only issue with doing it here is you will need to have administrator permissions as well as have to enter your password when updating files. For teaching purposes, I am going to assume you will install it here too.
Open the terminal and type:
<code class=’bash’>export THEOS=/opt/theos</code>What we are doing is setting an environment variable. You can always see if this variable is set by typing echo $THEOS in the command line. It will need to be (re)set every time you reopen the terminal to develop a jailbroken app.
Step 3: Getting theos
DHowett uses subversion for version control on theos, so you need to make sure and have it installed. If you followed step one above, it should have been installed by default. We will be checking out theos into the THEOS directory specified in step 2.
In the terminal type:
<code class=’bash’>svn co http://svn.howett.net/svn/theos/trunk $THEOS</code>You most likely will be asked for your password. You should now see the /opt/theos directory created with theos installed.
Step 4: Getting ldid
We now need to install the ldid tool. ldid is a tool written by Saurik (if you don’t know who he is, stop reading now). Basically, it simulates the signing process for the iPhone, allowing you to install your jailbroken apps/hacks on an actual device.
You can find this tool in many places, however DHowett has generously hosted it for us on his dropbox account.
Now, I had a tricky time getting this to download directly to my /opt/theos folder. So, I downloaded it to my desktop and then moved it in to /opt/theos/bin/ldid
<code class=’bash’>curl -s http://dl.dropbox.com/u/3157793/ldid > ~/Desktop/ldid
chmod +x ~/Desktop/ldid
mv ~/Desktop/ldid $THEOS/bin/ldid</code>
Alternatively, if you can get it to work properly, do it like DHowett suggests and download it directly into place.
<code class=’bash’>curl -s http://dl.dropbox.com/u/3157793/ldid > $THEOS/bin/ldid; chmod +x $THEOS/bin/ldid</code>Step 5: Install dpkg
Dpkg is a tool to bundle up your app into a Debian package for distribution in a Cydia repository. You can install it through Macports.
<code class=’bash’>sudo port install dpkg</code>Step 6: Creating A New Project
theos uses a tool called nic (new instance creator) to create a new project. Simply run nic by typing:
<code class=’bash’>$THEOS/bin/nic.pl</code>and it starts the new instance creator. Here is a sample of making a jailbroken application.
<code class=’bash’>brandon-trebitowskis-macbook-pro:Desktop brandontreb$ $THEOS/bin/nic.pl
NIC 1.0 - New Instance Creator
——————————
  [1.] iphone/application
  [2.] iphone/library
  [3.] iphone/preference_bundle
  [4.] iphone/tool
  [5.] iphone/tweak
Choose a Template (required): 1
Project Name (required): FartLight
Package Name [com.yourcompany.fartlight]: com.brandontreb.fartlight
Author/Maintainer Name [Brandon Trebitowski]:
Instantiating iphone/application in fartlight/…
Done.</code>
This will create a new folder with a basic template called fartlight (killer project, I know). In addition to the usual files it will contain a Makefile (for building the application) and a control file (information about the application when it’s in a Cydia repository).
This should now give you the basis for creating a jailbroken application/tweak/hack. In the next tutorial we will go over building, signing, and deployment. For now, you can check out the project I created with nic called inPulseNotifier. It’s a combination of a tweak (5) and a preference bundle (3) for the app settings.
Feel free to ask me a question in the comments and check out #theos on IRC.
Update Check out the next tutorial in this series here.
Happy coding!
-
Jailbroken iPhone Development – Would You Be Into It?
 As of recent I have had a ton of interest in doing development for Jailbroken iPhones. I love the power, being able to hack anything on the device. It opens up a whole new world of possibilities.
My most current project (inPulseNotifier) is a Mobile Substrate hack which allows the iPhone to interface with an inPulse watch. It uses BTStack and boots up during the init method of your springboard. I will do a full writeup on this in the near future, but basically it forwards all of your phone’s notifications (SMS, Local, Push, Calendar) to your watch!
Serious Lack Of Resources
InPulseNotifier was a blast to create, however I found it incredibly challenging to find many resources about doing jailbroken development. I finally found theos which was a total lifesaver. Also, I had the code for mobileNotifier to follow along with.
IRC (yeah I’m a true hacker ;)) was also huge help, but there simply aren’t enough tutorials/examples on the web related to jailbroken iPhone dev. My guesses are either 1. it’s quite hard, 2. there’s not enough <font color"green">$$$ in it, or 3. jailbreakers like to stay “underground”.
I haven’t quite figured it out, but I was curious what YOU thought about it as I’m considering doing some jailbroken iOS development tutorials on my blog. Please let me know in the comments. Are you down to “Hack the planet”?
-
Huge Update To Smart Lockscreen Creator + Promo Codes
 I have just updated Smart Lockscreen Creator and am giving away 10 copies!
I know you probably aren’t reading this as you race to see if any of the promos aren’t taken but…
Here is what’s new:
Misc
- Added ability to generate a new image on startup. Just turn Auto-Start on in the settings
Weather
- Toggle Fahrenheit and Celsius
- Added missing weather images
- Updated weather icons
- Improved performance and stability of retrieving weather
Customization
- Customize separator color and height
- Customize which day of the week to highlight for a calendar
- Ability to customize the background color of each widget
Minor Bug Fixes
The Promo Codes
METL6KNXW6TL
TWFHLKT7RYWK
J6JXJ7JPNJRN
XLP9FF9RAEA9
L74ATPTYXJ4F
A6KJPTLWE97P
HNWP6L7F6JW9
XEHNFKJPMR6Y
MFH3MNHKXF3A
FENRH4M9PAEA
Please leave a
5 starreview
-
Free App Per Day Service

As many of you may know, I created a site called Fresh Apps. This site started as sort of a Digg for developer submitted iPhone apps. Since then, we have added plenty of new features and have grown a community of over 10,000 iPhone users.
Recently, I have noticed a few services sprout up that basically have a schedule of apps that shift from paid to free for a given day. The most notable being Free App A Day.
After doing some research, sites such as these are charging a significant amount of money (I have heard up to $10,000) for a 1 day feature.
So, I was curious, given our user base, what do you (fellow iOS) developers think of FreshApps offering a similar service? If we did offer a similar service, here are some questions I have (and would love your feedback).
- How would you change existing services? What new features would you like to see? what features are worthless?
- How much would you pay for such a feature?
- Would you be interested in having your app featured the first month for a minimal cost ($1 or so)?
- Would you use an iPhone app that lists the upcoming paid to free apps?
Thank you all so much for your feedback. I’m just in the brainstorming time of this, but I will totally keep you up to date if anything comes of it.
-
New Year, New Blog Theme
 I seem to change my WordPress theme more often than I change my socks. I just tend to get very bored with my blog aesthetics. Not to mention, I will always find someone out there with a cooler blog theme than mine.
After setting up a blog site for the pastor of my church (http://brownbishop.com), I fell in love with the Standard WordPress Theme. Not only is the theme absolutely beautiful out of the box, it’s also a theme framework giving you TONS of configuration options including custom layouts, social network integration, and analytics integration. I have seen quite a few amazing blogs built on top of the Standard Theme framework that all look incredible but completely different.
So, I urge you to check it out, It’s kind of pricey ($50), but well worth worth it in my opinion.
-
Pocket MUD Update Approved
 Wow, in record time (2 business days!), Apple approved the update to my iPhone app Pocket Mud. For those of you who don’t know, Pocket MUD is my FREE MUD client for the iPhone.
Here is whats included in the update:
- Added support for Landscape!
- Auto-reconnect on reopen
- Multiple actions for triggers (just separate the actions with commas)
- Added ability to play sounds when a trigger fires (please send sound suggestions to brandontreb@gmail.com)
The app is free, so please check it out and leave some (positive) feedback!

-
Ludum Dare Competition: Week 2 Update
So another week has gone by and I have made quite a bit of progress, here are the additions since I last posted.
- Texturing
- Lighting
- Skybox
- Better Terrain generation
- Environment Fog
- Basic navigation
So judging by the screenshot, you might really be thinking that I’m working on Minecraft for the iPhone (I used textures that someone created for Minecraft). While this isn’t my intention, it is starting to look like my engine would be perfect for a simple port. Perhaps, I may consider creating something inspired by Minecraft in the future. For now, I will be sticking to my current game idea which I call Cube Hive.
As I continue to update this blog, the game idea will become more and more apparent but basically I want to create a game similar to this on the iPhone in a cube environment.
Anyway, here is a screenshot of where I’m at:

Oh, and BTW doing Fog in OpenGL ES is crazy easy. Here is the code (thanks to Mike Daley of 71 Squared for showing me this)
<code class=’objc’>GLfloat fogColor[] = {1.0f, 1.0f, 1.0f, 1.0f};
    glFogf(GL_FOG_MODE, GL_LINEAR);
    glFogfv(GL_FOG_COLOR, fogColor);
    glFogf(GL_FOG_DENSITY, 0.5f);
    glHint(GL_FOG_HINT, GL_DONT_CARE);
    glFogf(GL_FOG_START, 10);
    glFogf(GL_FOG_END, 20);
    glEnable(GL_FOG);</code>
That’s it! Such a great effect with so little effort.
Anyway, I don’t foresee my game being completed by the end of this month for the Ludum Dare competition. However, I have been working on a killer MUD client for the iPhone that I will most likely submit. I feel that current solutions are clunky, ugly, and unintuitive (sorry if you are a reader and a dev of one of these :/).
I should have some screenshots up soon.
I would love to hear thoughts/opinions of doing a Minecraft inspired game as well?
-
Calculator Creator Released + Promo Codes

I have recently been developing an iPhone app in my free time called Calculator Creator. This application has been an idea of mine for quite some time and I finally found the time to complete it. Here is the complete description of the app.
The last calculation app you will need to buy!
With Calculator Creator, you are easily able to build your own “Calculators” as long as you know their equations. The process couldn’t be easier.
Simply:
- Name your calculator (ex Cost Per Square Foot)
- Add the fields involved (ex Cost, Square Foot)
- Create the equation (ex Cost/Square Foot)
- Use the calculator whenever you like
Why purchase a unit conversion application for more, when you could have EVERY unit conversion in one clean application.
Calculator Creator also comes packed with over 20 sample calculators including:
– Unit Conversions
– Mortgage Payments Calculator
– Temperature Conversions
– Tip Calculators
– and more!If you are reading this and want a free copy of my Calculator Creator, try using one of the promo codes below. Also, please consider leaving me an iTunes review (especially if you are getting the app for free! :))
I would love to hear suggestions for future improvements and features.
Download Calculator Creator on iTunes
PROMO CODES
LRREPTP3E64Y
L6RPN9KYHLFR
9P3YETKR4XTW
H4HF4R4L9K7L
KTRAJYF4M97L
M34ALYRTHJRY
MMFFM7LRJTAP
A3WYL4EKF797
T93FK4479AWX
RHWWJEKNE3AM

-
PoV’s Challenge: Week 1
After a week of studying my butt off with OpenGL ES, I have finally started work on my game engine for my Pov’s Challenge game.
As you can tell from the screenshot below, I have been playing entirely too much Minecraft and have cube art on the brain.
It’s not much right now, but I do have a basic cube rendering engine that takes in a level file and renders the environment. Here is a screenshot of a very simple level.
 It’s not looking super killer at the moment, but I have yet to do fancier lighting or any texture mapping.
Ohh My Game Idea You Ask?
Well, without going into too much detail, it’s pretty much an epic battle of mass proportion set in a 3D cube environment (hint: it’s not iMinecraft ;)).
I will give more details as I go about the month and near the completion of my game.
Also, in case you are interested, here is what the level file looks like for the generated environment.
**GG,GG,GG,G,GG,GG,GG
GG,G,G,G,G,G,GG
GG,G,G,G,G,G,GG
GG,G,G,G,G,G,GG
G,G,G,GG,G,G,G
GG,G,G,G,G,G,GG
GG,G,G,G,G,G,GG
GG,G,G,G,G,G,GG
GG,GG,GG,G,GG,GG,GG**
The number of G’s that appear represent the height at that location.
The current roadmap is:
- Texturing & Lighting
- Collision Detection / Navigation
- Gameplay & Audio
- AI
- Menus / Title / Pause (secret sauce ingredients)
By next week, I should have some sort of level editor and some basic skinning going on.
Hopefully I can finish this sucker by the end of the month. Its’s been an intense journey learning openGL from scratch in 7 days and I know that I still have quite a ways to go. Again, if you are participating in this challenge, link me to your development blog in the comments.
Happy coding!
-
Game Dev Challenge + OpenGL ES Resource List
The other day, I was reading Ludum Dare and saw a very interesting post. It was a call to action for all game developers to get serious and actually put something out there. Here is a link to the post:
PoV’s Challenge: Make a game, sell 1 copy
The idea is for would-be indie game developers to create a game in the month of October and sell at least one copy. There are no judges, it’s not a competition with anyone other than yourself. According to PoV from Ludum Dare:
Think of this as a race (or a Nanowrimo for games+business). Have something new for sale and in a store by the end of October. And if you can sell a copy (or sign a licensing deal, or earn $1 in ad revenue), you win.
I have been attempting to learn OpenGL since my early days of programming 10 years ago and it has never stuck. I figured this would be a perfect opportunity to really buckle down and learn it. Recently, I have stumbled upon some really great **OpenGL ES resources and tutorials **that have really made things “click” for me. I wanted to share them in this post.
1. OpenGL ES From The Ground Up
 URL: http://iphonedevelopment.blogspot.com/2009/05/opengl-es-from-ground-up-table-of.html
This is a blog created by Apress author Jeff Lamarche. Jeff has been blogging about opengl es for quite some time and probably has one of the best opengl series out there. His tutorials are aimed at the absolute beginner and he takes a very nice approach to teaching OpenGL ES.
The link above will take you to his table of contents of tutorials. Where you can read up on his articles ranging from drawing basic triangles to importing 3D models from Blender.
_
2. Simon Maurice iPhone OpenGL ES
 URL: http://www.cocoachina.com/wiki/index.php?title=Category:Simon_Maurice_iPhone_OpenGL_ES
This is an incredible 20 part series that was translated from Chinese to English and posted on the CocoaChina Wiki. These articles take a slightly different approach, while still doing a great job of teaching you OpenGL ES.
The articles are well written and quite comprehensive. It is obvious that the approach isn’t quite as professional as Jeff Lamarche’s blog, however this series goes a lot more in depth and will teach you more complex concepts such as handling touch and moving in 3D.
3. NeHe OpenGL Tutorials
URL : http://nehe.gamedev.net/lesson.asp?index=01
 These are oldies but goodies. The NeHe tutorials have been around for years and years. In fact, I attempted to understand them in my early days of coding when I declared every method as static in Java so I didn’t have to instantiate the class to call it (fail). Either way, these tutorials are a staple in the Open GL community.
Although they are not written for ES, they still provide some solid OpenGL concepts. I would strongly suggest reading these after you have read through the other 2. There are some limitation of OpenGL ES (like not supporting GL_QUADS), that will quickly confuse you if you try to write the Nehe tutorials on the iPhone.
One killer thing about the first link I mentioned is, Jeff Lamarche actually ported the first 6 Nehe tutorials to the iPhone and they can be found on the page I linked to.
I will be studying these resources carefully over the coming month. I intend to take the plunge and developer a simple OpenGL ES game in the month of October and sell 1 copy.
So, please join me! If you decide to do this and are journaling your progress, link your blog in the comments. I would love to follow it. I will be doing the same here.
Happy Coding!
-
App Store (Link Share) Affiliate Link Generator
A while back, I wrote a post called ”Money You Might Be Missing Out On” where I discussed the Linkshare API. Well, I took it upon myself to create a simple tool that I have been using in my blog posts to quickly generate affiliate iTunes links for iPhone apps. Here is a screenshot of the app.

The generator is quite simple and perfect for bloggers that are discussing apps. Here is how it works.
- Sign up for LinkShare (if you haven’t already done so)
- Go to http://brandontreb.com/apps/linkshare/
- Enter your LinkShare Token. You get this in the Web Services section if the LinkShare site when you sign up.
- Select a merchant. By default, I have already populated it with Apple iTunes. Linkshare supports thousands of affiliate programs, so you can click other if you are using it for something else besides the app store.
- Enter the App Store URL of the application that you wish to get an affiliate link for. (ex http://itunes.apple.com/us/app/hundred-pushups/id301174591?mt=8)
- Click submit
Now, it will interface with the LinkShare API and produce an affiliate link for your account.

I hope you find this tool as useful as I do.
-
iPhone In Action Book

A couple months ago, I was asked by someone on Twitter if they could “introduce me to someone”. I found this question a little odd so I responded with “like a girl or a developer?”. I often tweet about my wife, so I was hoping he was not referring to a girl. He replied with “no, someone at Manning Publishing, they are looking for an author for their book iPhone In Action”. So, I was put in contact with Manning and they eventually offered me the position as one of the authors on the book iPhone In Action.
iPhone In Action is a book (that is already out) and details how to program for the webkit as well as the native iPhone OS. I will be removing the webkit chapters, updating some of the dated chapters, and writing about 6 new chapters related to OS 3.0.
I will be posting about the book and my progress along the way (don’t worry I won’t stop my random tutorials about Twitter, WordPress, etc…). Just wanted to share that and say go out and buy the book (in December when I am finished and will get the commission
 ).
).Happy Coding!
-
Free Leaderboard Solution for iPhone Game Developers

What makes most multiplayer games more exciting that single player games? It’s competition! People love to compete with eachother.
And how can competition be achieved in single player games? Leaderboards.
A leaderboard is basically a table ranking players based on their scores in the game. This allows players to see how they stack up against other players.
The Problem
Many programmers either know how to do web development or system development. They don’t know both and certainly don’t know how to integrate the two. This is why I believe there are not more single player games with leaderboards in the App Store.
The Solution
This is where iPhone Leaderboards comes in. It’s an online hosted leaderboard that is incredibly easy to integrate with any iPhone game. The code to integrate with iPhoneLB is given to you to paste directly into your own. It couldn’t be easier.
Try it out and let me know what you think!
-
Part 3 of iPhone Game Programming Tutorial Posted On iCodeBlog
It’s been a while, but I finally posted part 3 of the iPhone Game Programming tutorial series on iCodeblog.com. The focus of this tutorial was to create a splash page for your game that fades into your game’s main view.
I chose to create this tutorial after seeing many games that just jump right in to the main game play. A splash page makes the game feel more “professional” as well as gives the developer a chance to brand the app by displaying a company logo or something to that extent.
Hopefully, I will be able to get part 4 up in a timely fashion to teach developers how to incorporate sounds into their games.
So, go ahead and check out part 3 of the iPhone Game Programming Tutorial Series.
-
Why Many iPhone Apps Suck
I have been downloading many different iPhone apps lately and have noticed that many of them suck.
When I say they suck, I’m not necesarily referring to the content of the app. What I am talking about is the programming of the app. But Brandon, how do you know the programming sucks. Well, frequent crashing is an obvious indicator. Also, taking too long to do various computations as well as overall awkwardness.
This is because many non-programmers or hobby programmers decide they want to make an iPhone app without first learning the objective-c language. People just use jank copy and pasted code frankensteined from different examples, close their eyes and pray. This is the architecture of many iPhone apps.
So, who’s fault is this? Well, at first I wanted to say Apple for their lack of tutorials/explanations. After thinking about it, I feel it’s simply lazy programmers driven by trying to make money rather than the desire create a solid and useful applications. It’s quite sad actually.
One challenge here is the iPhone is a terrible platform to learn programming with. The forced program design assumes you have a solid understaning of object oriented programming design patterns as well as many other advanced programming topics. Many CS students don’t even get this until their second year in college! So how can a novice programmer jump right in and make an iPhone app? They code a pile of crap.
So what’s the solution to this? Well I’ll tell you. Teaching people objective-c from the ground up (that, and Apple being more selective when approving apps). I intend to write a whole series of beginner objective-c tutorials (using the mac as a platform rather than the iPhone). I’m not sure yet if these will be posted here or on icodeblog.com. I have yet to decide.
So stay tuned for the first Mac Application Development tutorials.
-
Buzzword Is Now In The App Store
Well, after anxiously waiting for the past 6 days (feels like forever) I have finally gotten that magical email from Apple stating that my “application is ready for sale”. The application of course referring to a game I created called Buzzword.
Buzzword is essentially a clone of the popular party game CatchPhrase ported on to the iPhone. Click Here for all the details on Buzzword.
I am asking a huge favor to anyone that wants to participate. I will give you a free copy of Buzzword (wow saves you a whole buck) if you would kindly write a review of it on your blog or website. If you are interested, either post a comment in this post, contact me, or hit me up on Twitter.
Click on the image below to download Buzzword now.

-
Binary Game – iPhone App Review
Just posted an app review of B1nary Game over at FreshApps. Check it out!


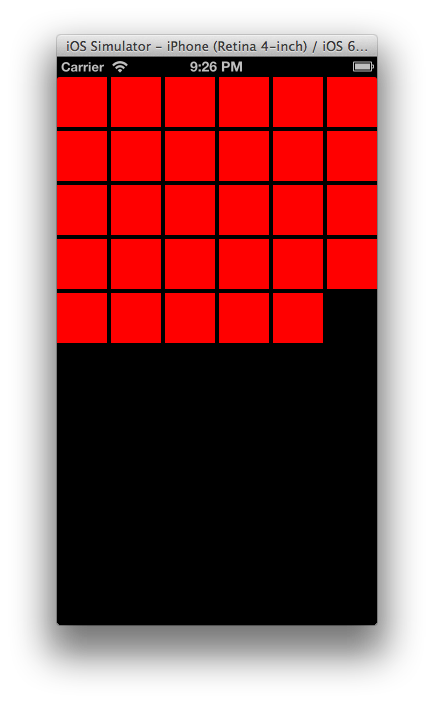


subscribe via RSS
